How to make my podcast sound decent?
This is a work of fiction. Names, characters, places and incidents either are products of the author’s imagination or are used *fictitiously*. Any resemblance to actual events or locales or persons, living or dead, is entirely coincidental
Have you and your friends started a podcast? Are you lost trying to get everyone to talk louder/softer, trying to mix everything during the recording and ultimately having significant volume level disparity? Do not despair, everything can be saved with a little bit of audio processing. Just follow this quick guide and you'll be able to level out your audio in less than 5 minutes.
For this, we will use Audacity, which is free and open-source. We will work on an example that will showcase the usual pitfalls of home recording in less-than-ideal situations. That example comes from a random podcast on the internet, no need to look too closely at it.
Tiny bit of physics and a crash course for Audacity
Sounds are represented by waveforms:
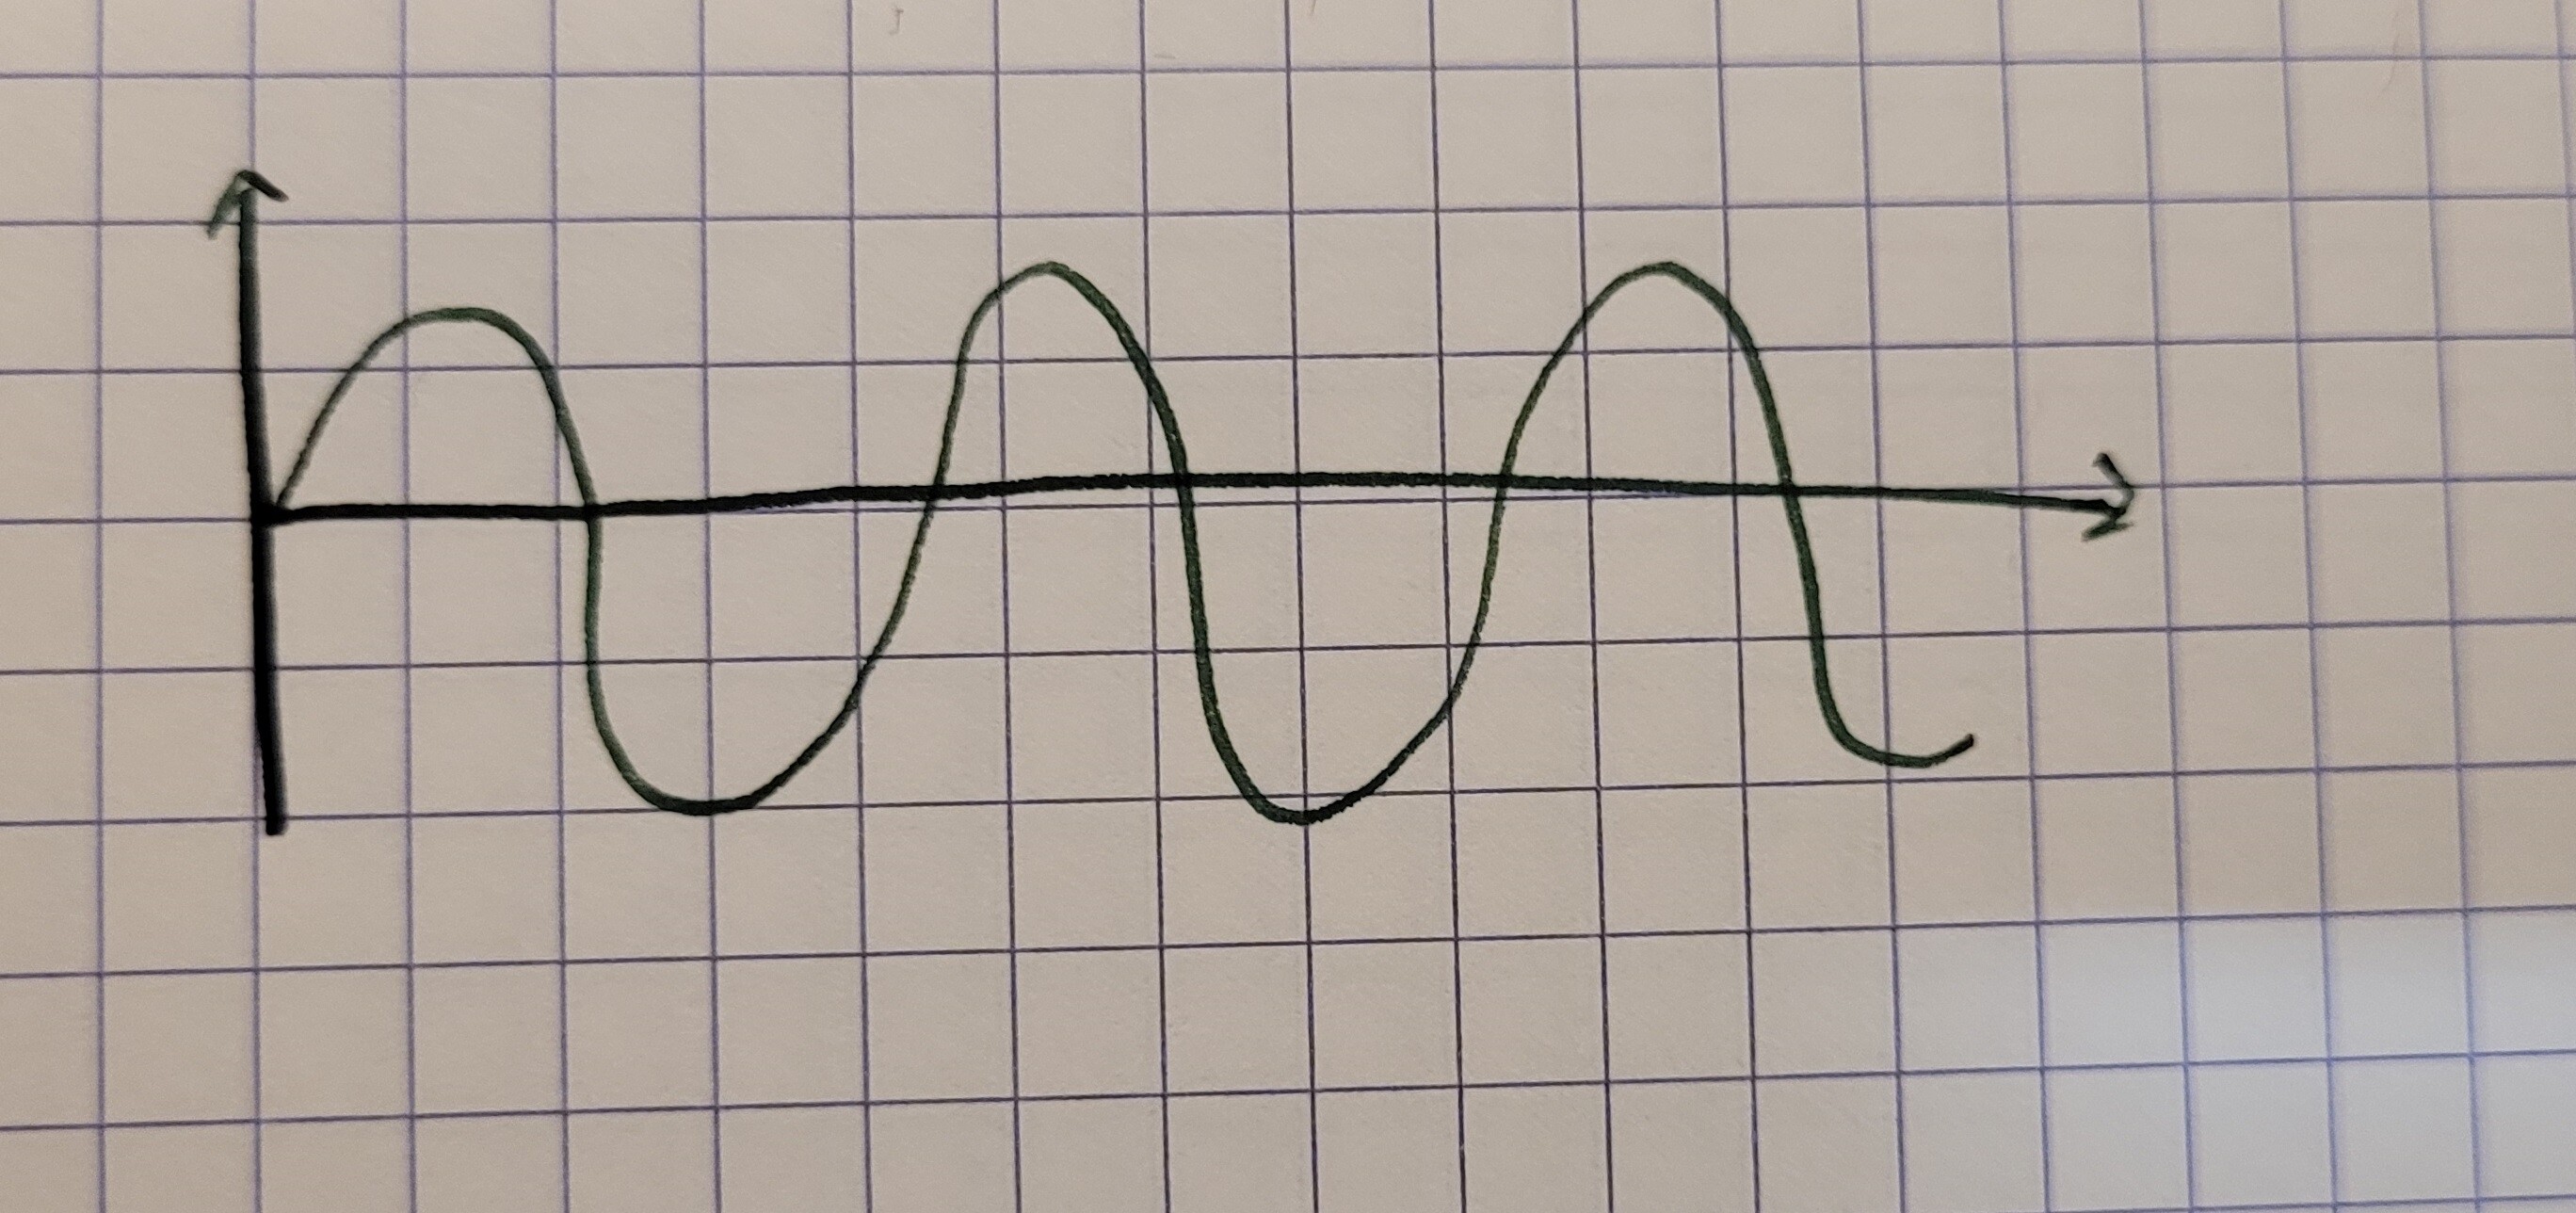
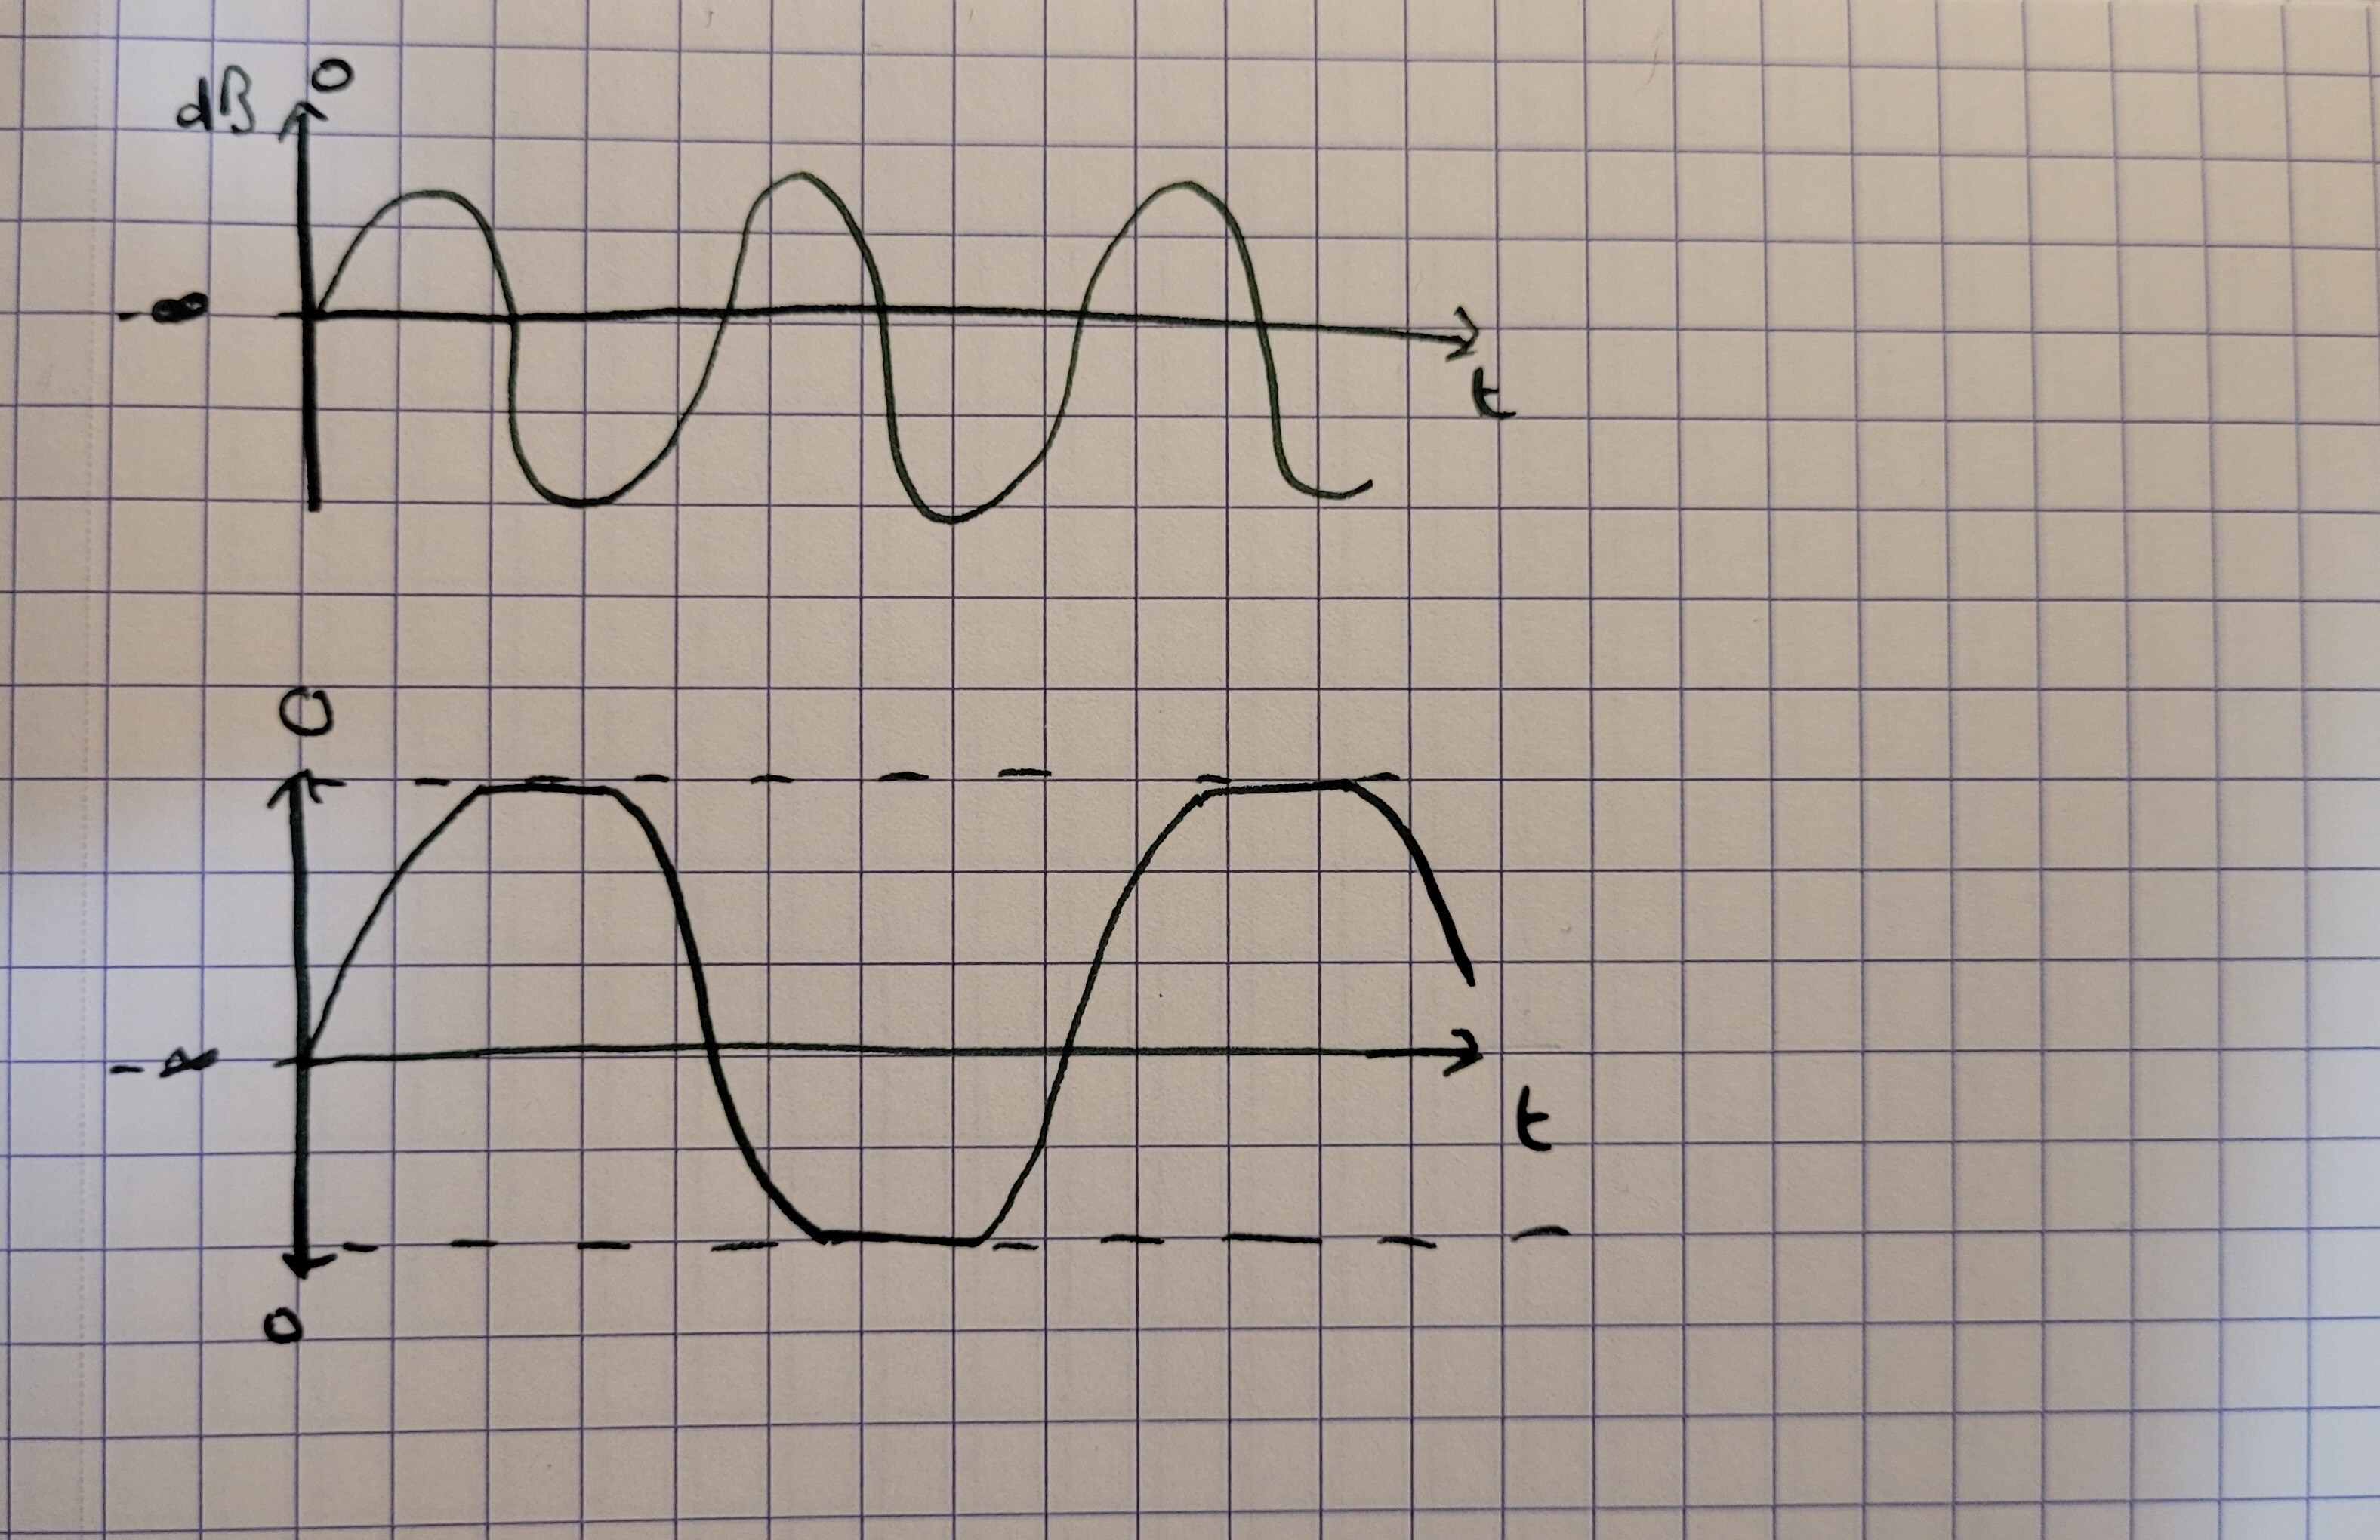
The x-axis is time and the y-axis can be a number of things, but we will use decibels (dB). dB is the measure of the sound's level, i.e. how loud it is. When manipulating audio, usually we have the scale start at -infinity and end at 0, where 0 is the max dB before clipping. Here is the same drawing with the axis labeled and an example of what clipping does to a waveform:
Here is what it looks like in Audacity:
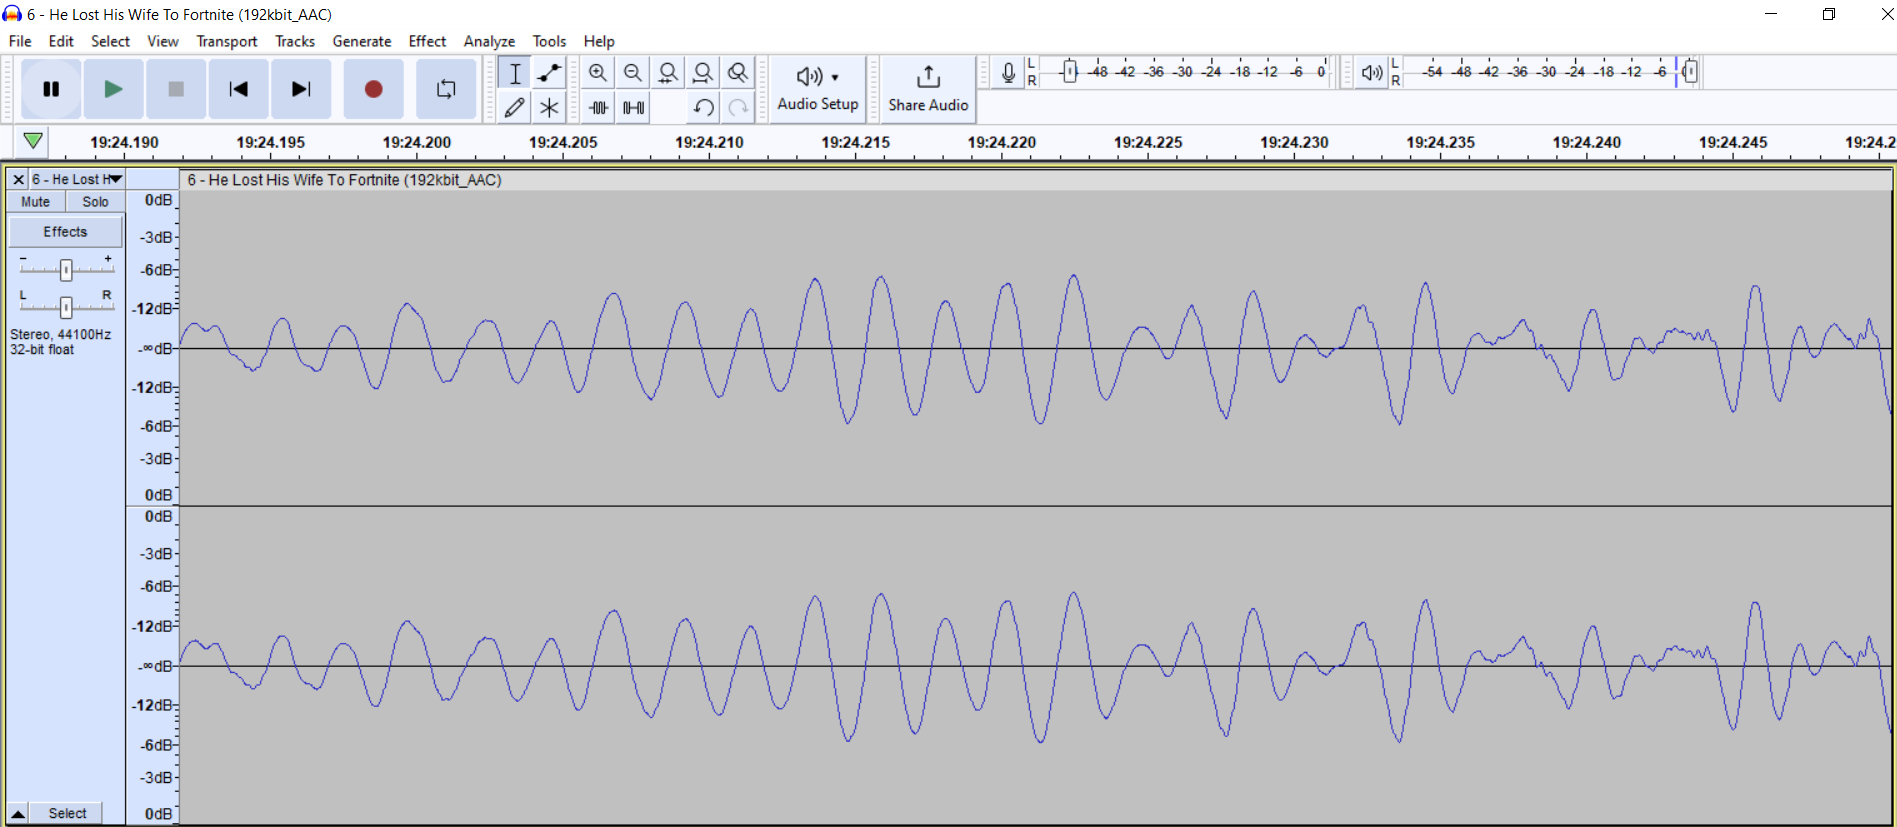 The left and right channels are stacked on top of each other, that's why there are two waveforms
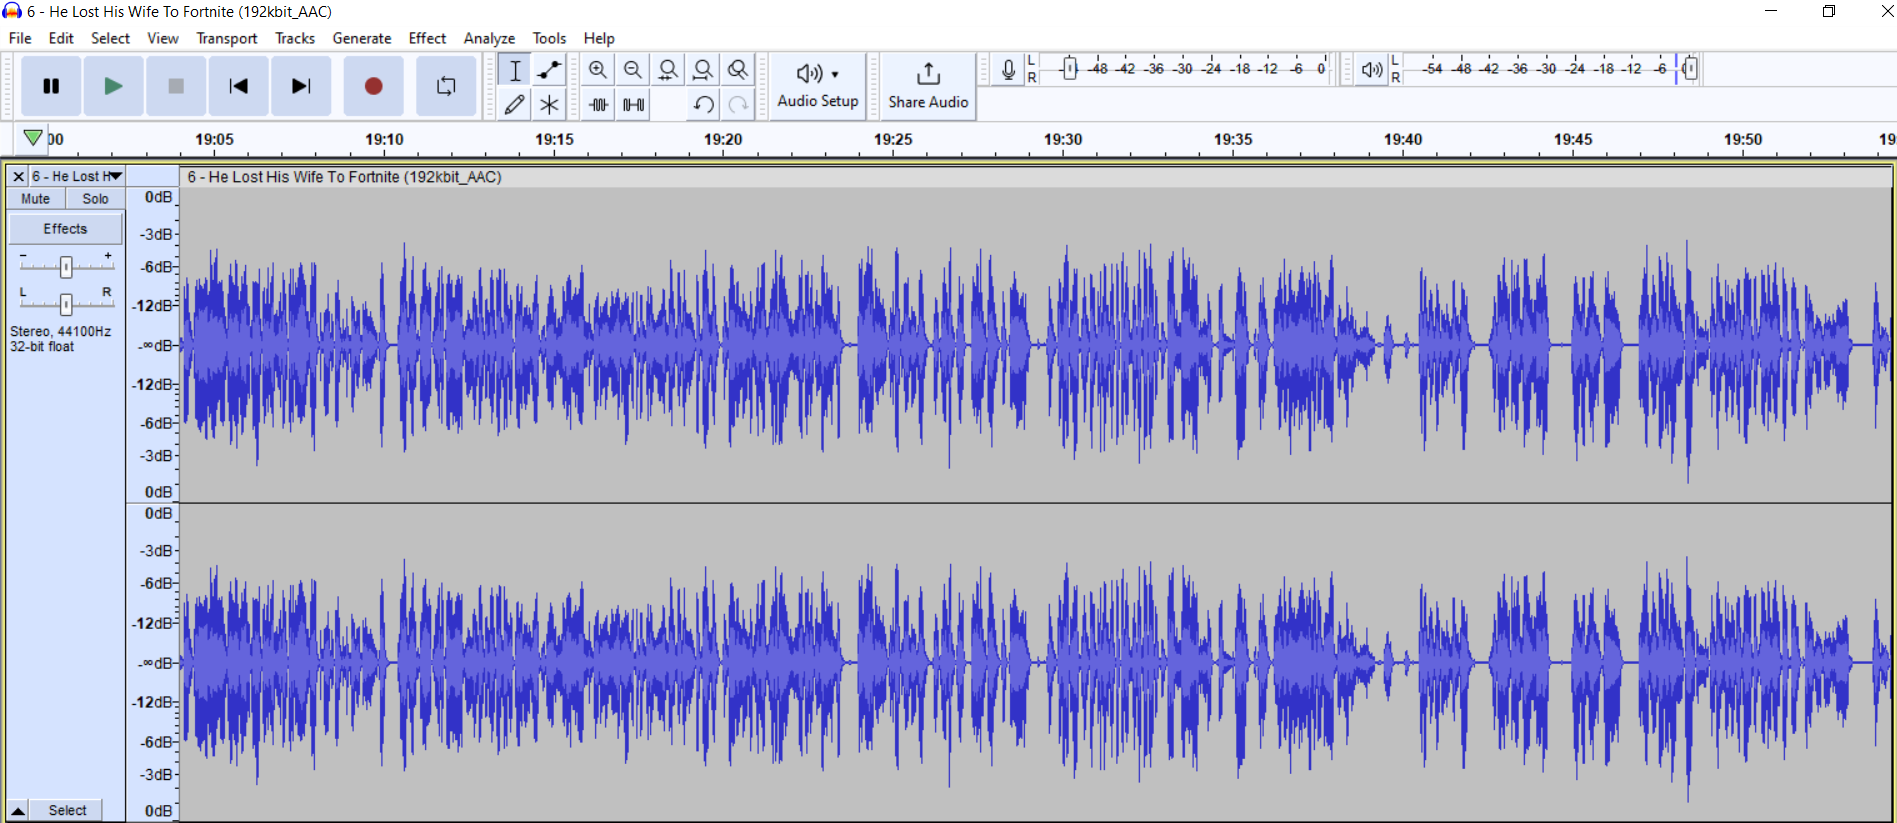 This is with a different timescale, not milliseconds but seconds
Pretty similar no? (You might want to right-click on the scale on the left and select “linear (dB)”). There is a lot of extra info and other things, but worry not. Apart from the main track, there is only one other thing you should pay attention to, and that is the playback level bar at the top right-hand corner.
The green bar is your current audio level. The blue line is the max level your audio reached, the green line is the max level your audio reached in the last 3 seconds.
And that is literally all you need to know.
Unprocessed sound
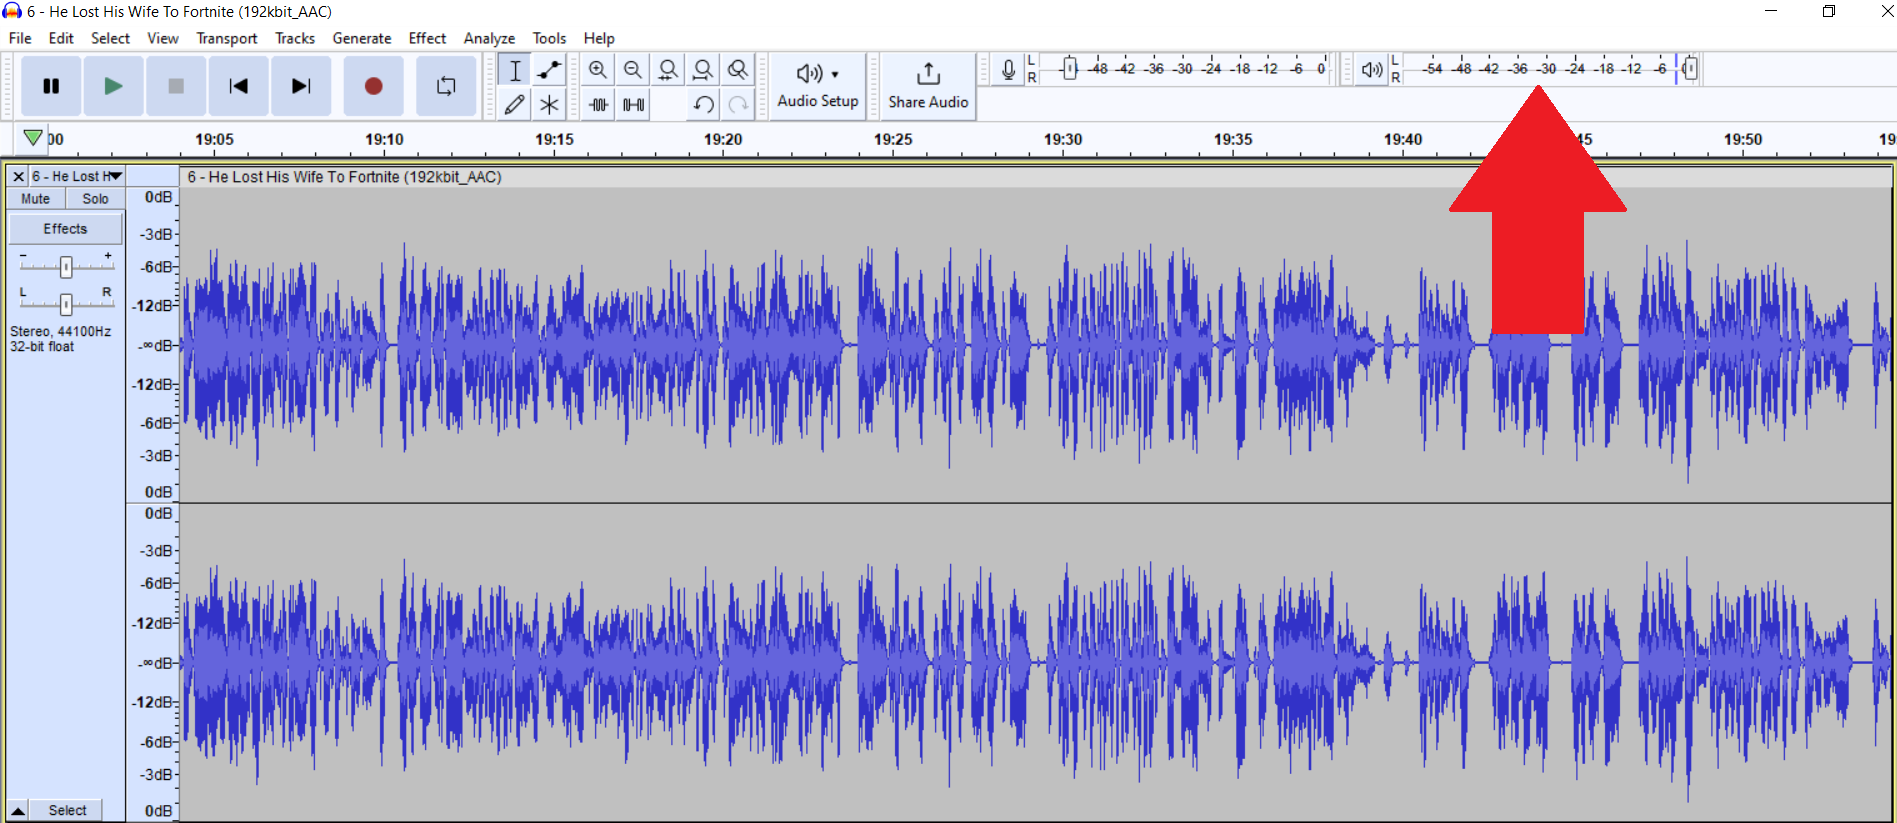
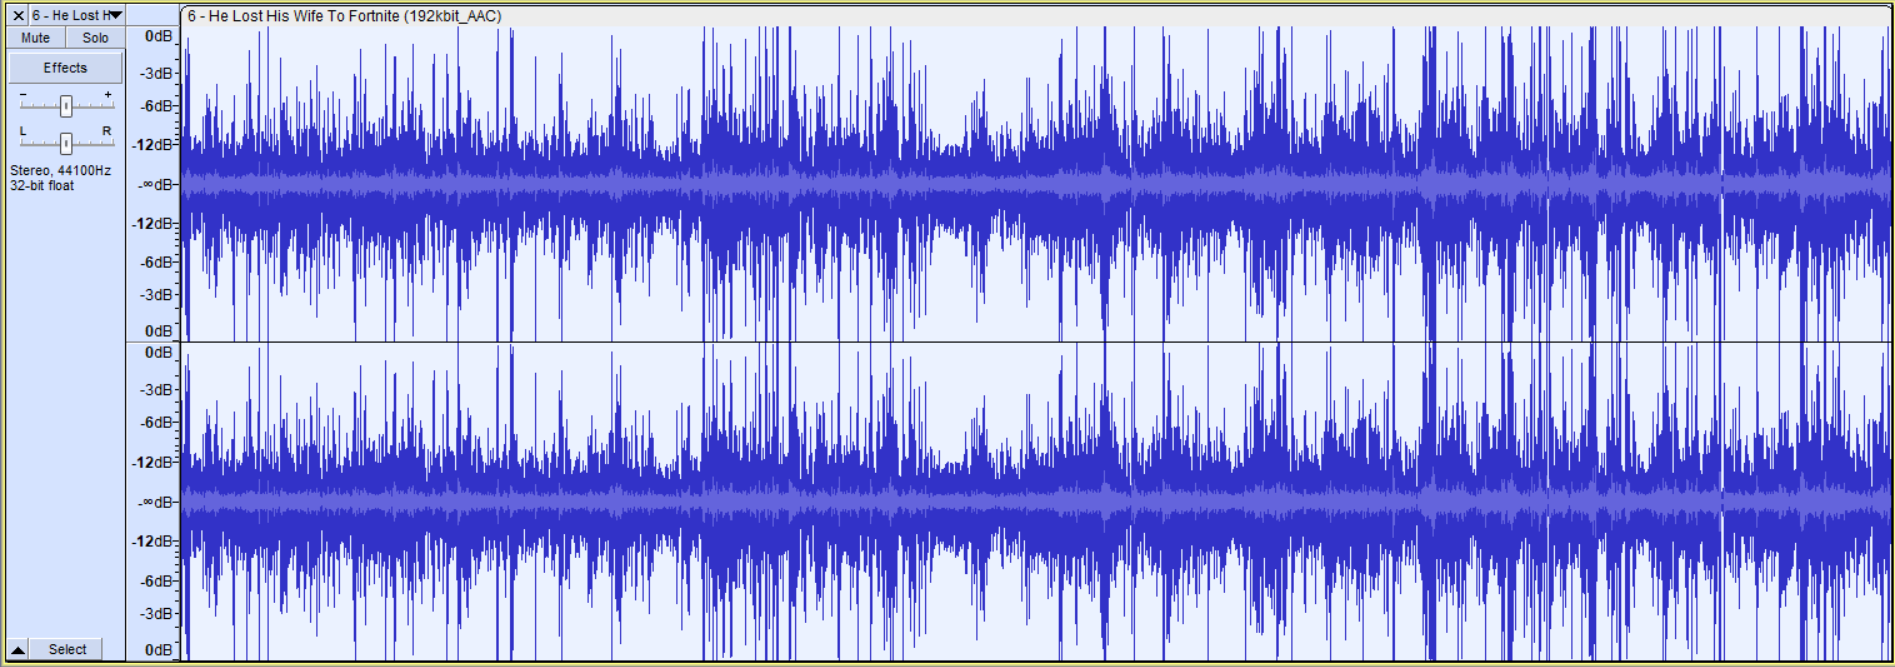
Here is what we are working with:
Yikes, as you can see most of the talking portions are between the ranges of -24 to -18 dB, almost inaudible. Then you get random peaks that reach 0 dB, potentially clipping. Usually for podcasts, a small dynamic range — the sound level difference between your average quietest and average loudest sound — is preferred. Having everything and everyone between -6 to 0 dB is ideal. A listener doing something or walking somewhere does not want to have to adjust the level every 5 sec, if at all. Side note, there is no saving a clipping sound, that is honestly the only thing you you need to look out for when recording.
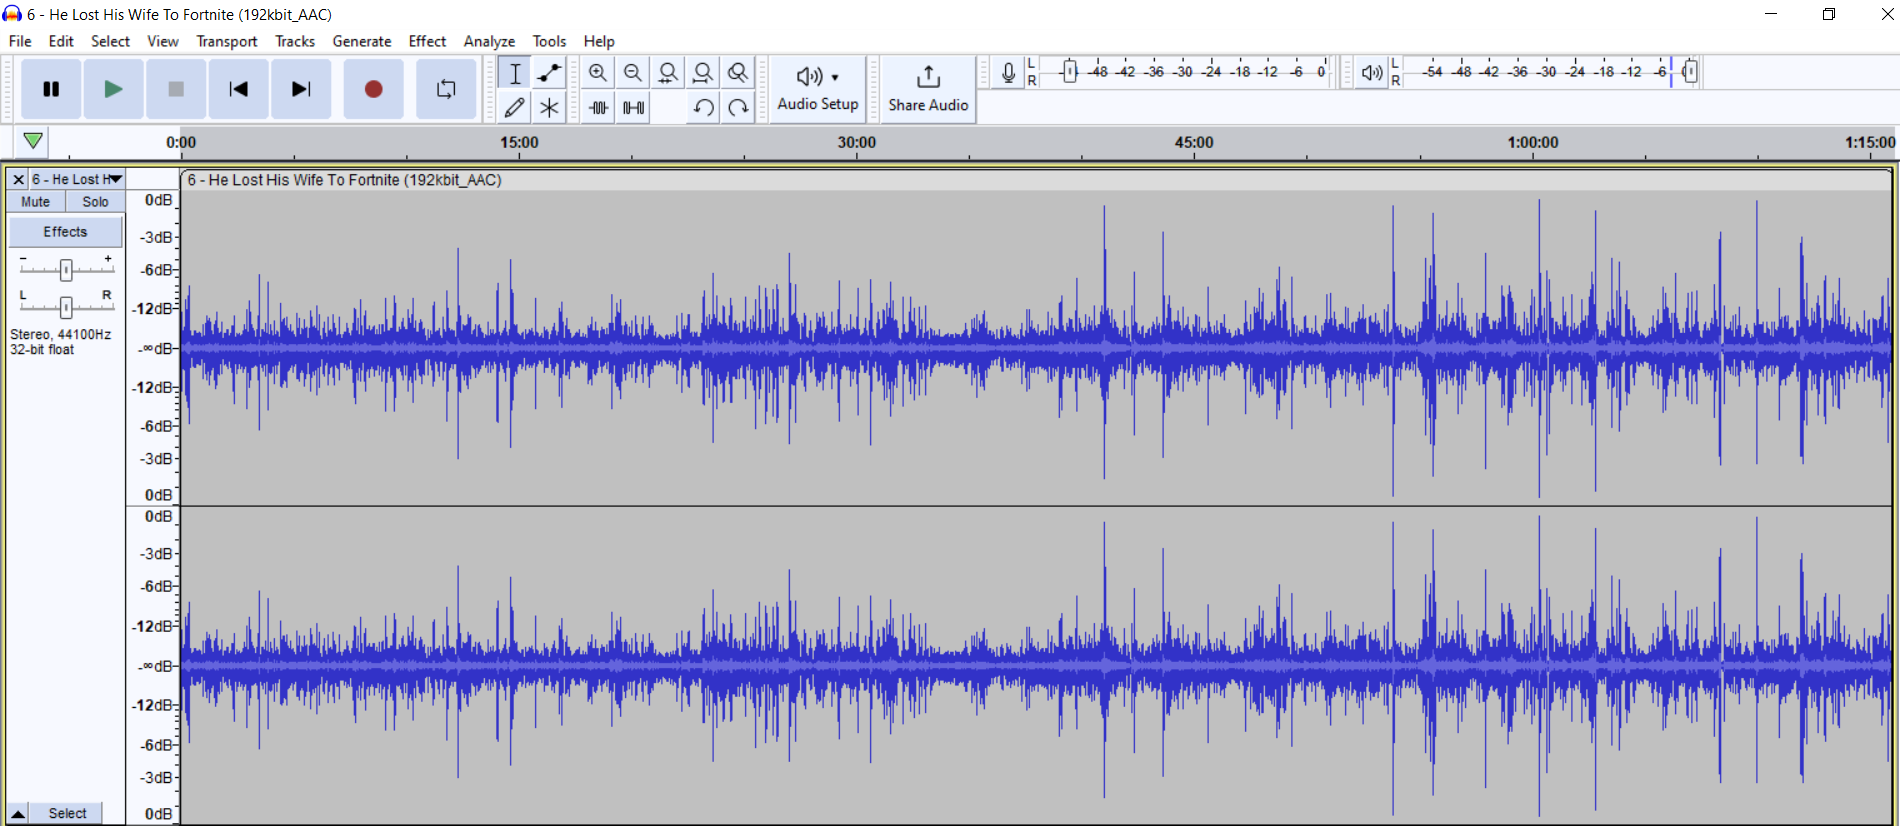
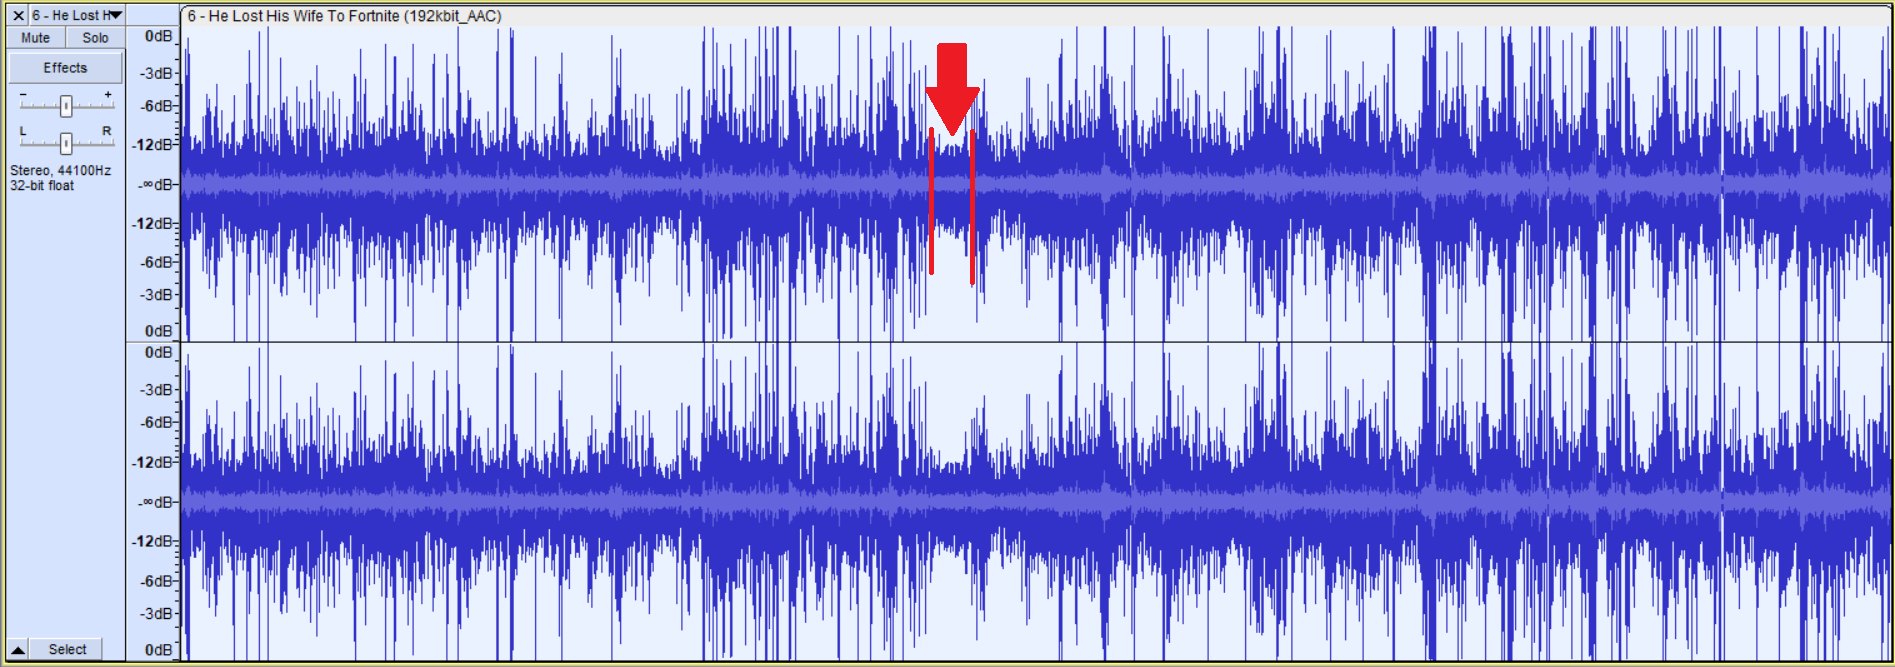
To improve this audio, we want to bring down the loud sounds to about the same level as the quiet ones and then bring everything up. If someone speaks very loudly, we want them to be at the same level as someone speaking softly, and then increase the gain to make everyone loud. Let's first take care of those peaks, we will have to be stern with them, therefore we will use a limiter with a hard limit. This will make sure no sound goes above the set limit. To set our limit, we'll choose the loudest sound that doesn't look like a peak; we only want to destroy those peaks, we'll be much softer on the loud voices. Here it is at around the hour mark.
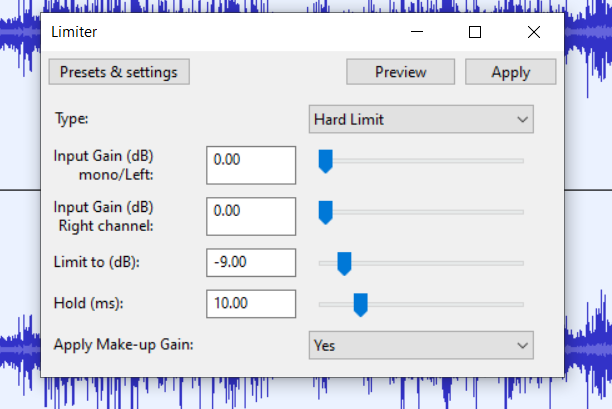
Looking at the Playback level bar, it is between -6 and -12dB, let's say -9dB to be safe. So we select the whole track (Ctrl+A) go to Effect>Volume and Compression>Limiter... at the top. Here we make sure to select hard limit, set the limit to -9dB and apply makeup gain. This last option will bring up everything at the end, so that the loudest sound after limiting is 0 dB. We get this:
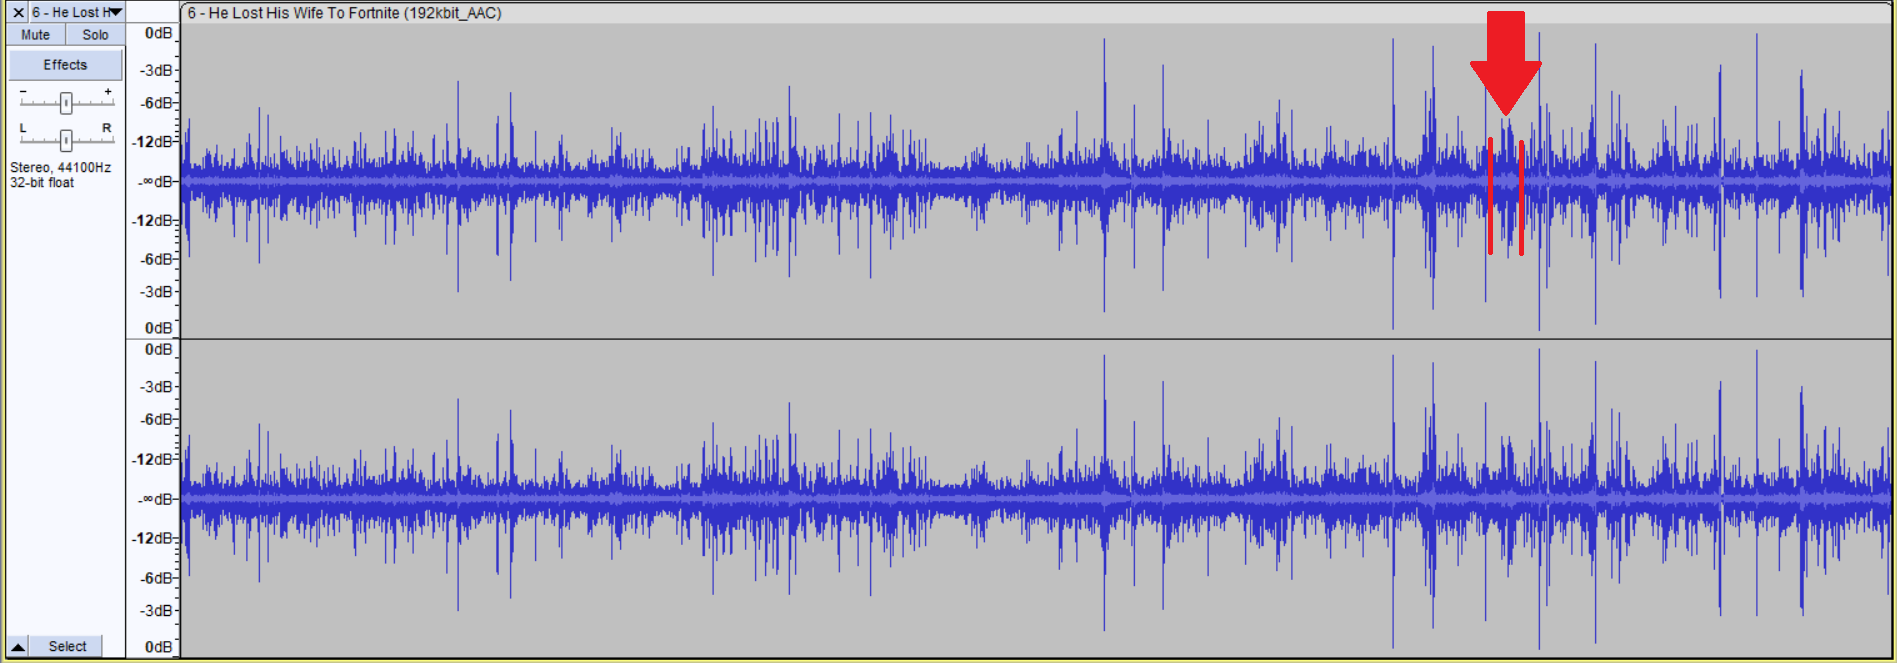
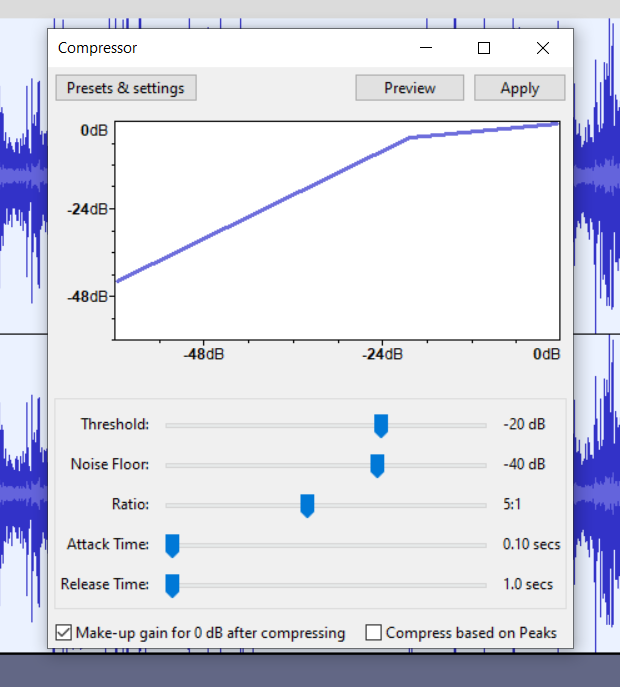
Much better, now we can almost hear things, but there are still big differences in level between parts of the recording; probably one person sounding quieter than another. We want to fix that too but we want to be more gentle. If we were to just use a limit, it would make the recording sound very unnatural. We will therefore use compression. With compression, you set a threshold, and every sound going above it will be reduced by a certain ratio. Those are the two parameters we really want to look at, the rest, attack release... are not very important to us as we are only dealing with voices. To find a suitable threshold, let's look for a more stable quiet part of the recording, this one looks good:
It 's around the 35min mark, and hovering a bit below -18 dB, let's say -20dB. We'll choose this as our threshold, this way, all the loud parts will come down past that lower level. Let's go to Effect>Volume and Compression> Compressor... and set it there. Usually, you want to use a threshold just below what the average level of the quiet part is, our guestimate works just fine in this case. For the ratio, it depends on how much you want to reduce your dynamic range by; 5:1 always works well for me. 2:1 barely does anything for us and 10:1 might sound a bit too artificial. For the attack and release, just set it to the lowest possible, no need to worry about those for our use case. Make sure to tick the “Make up gain for 0dB after compression”, that will make sure that, after compression, our recording's max level reaches 0dB.
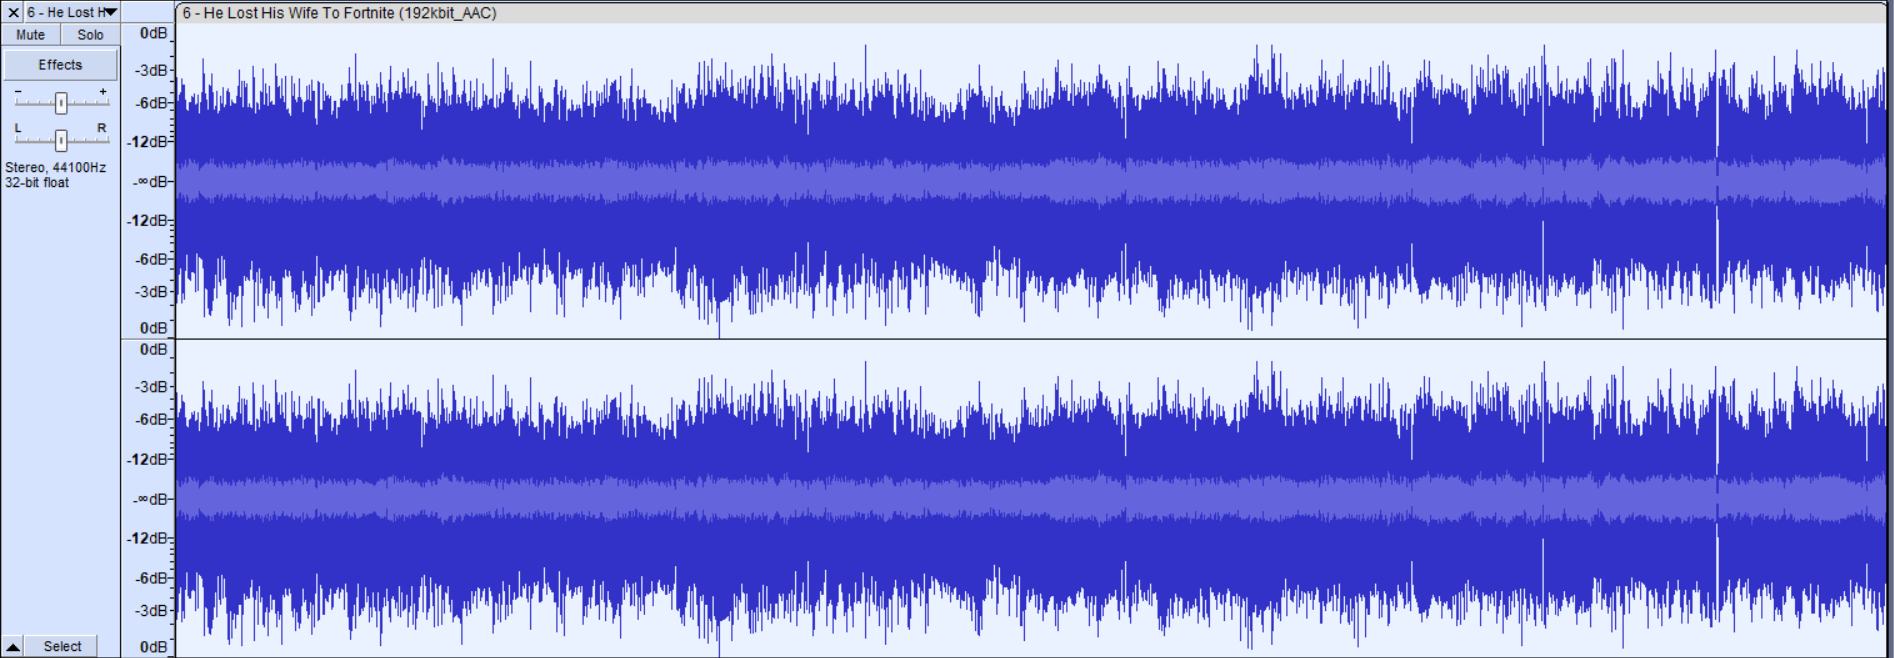
Look at that beautiful waveform, thick, consistent. This will offer the most comfortable listening experience, which should be your goal, unless you hate your audience (based). If you find the result lacking in your own test, mess around with the threshold or the ratio, or be more aggressive with the limiter if you have nasty peaks. In any case, you now have the tools to either start your own podcast featuring decent audio, or even fix a podcast you started 11 episodes ago.